Design Patent Claim Boundaries: A Litigation-Smart Guide for Attorneys
- IP DaVinci
- Article
- June 6, 2025
Table of Contents
🎯 Want More Defensible Design Patents?
Design patents often succeed or fail based on how clearly their boundaries are drawn—literally. If you’re relying on your drafter or 3D tool to “just get it right,” you’re risking more than just a §112 rejection.
This post teaches you how to define the metes and bounds of a design patent claim with confidence—backed by best practices from litigation and prosecution.
⚖️ Why Drawing Boundaries Are Legal Boundaries
In utility patents, words define scope.
In design patents, drawings are the claim.
If you fail to clearly show what’s protected and what’s not, you risk:
- Rejections for indefiniteness or new matter
- Narrow interpretations that gut your design rights
- Competitors copying what wasn’t cleanly disclaimed
That’s why your drawing strategy is your claim strategy.
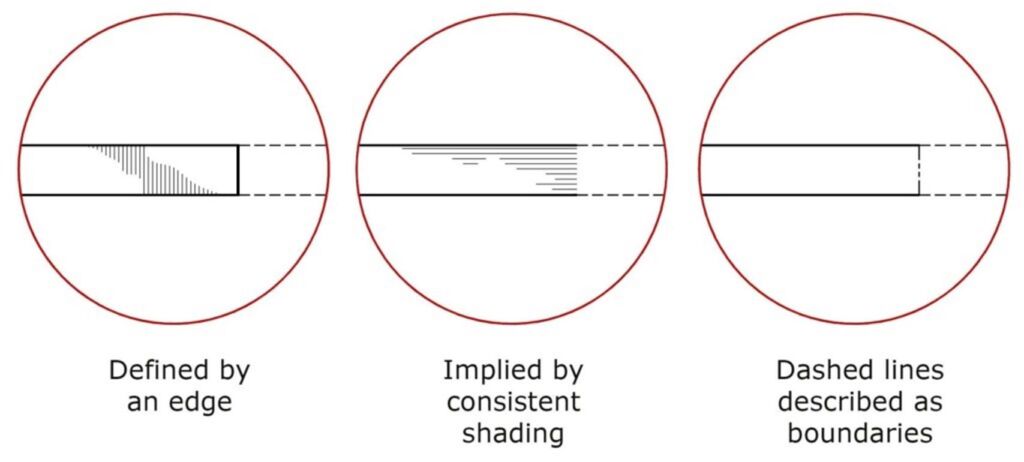
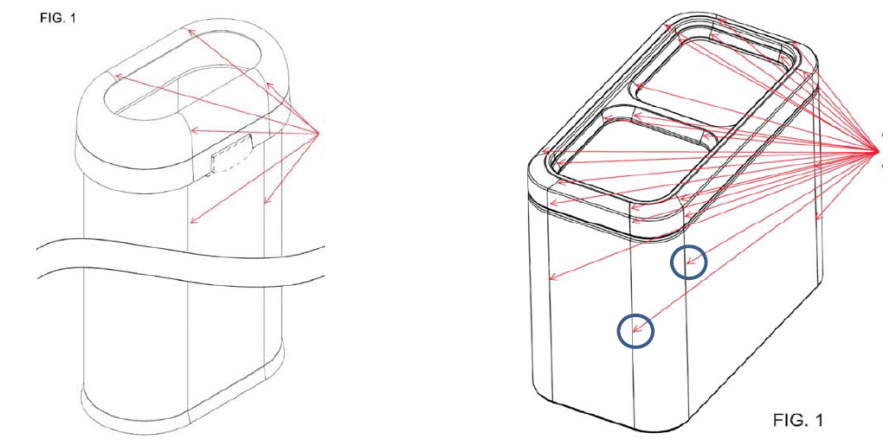
✅ Method 1: Define by Visible Edge (When It Exists)
The cleanest method: use the product’s actual edge as the boundary.
- Solid lines = claimed portion
- Dashed lines = disclaimed portion
✍️ Use case:
When the claimed part naturally ends at a real feature—such as a screen boundary, bezel, or connector port.
Attorney tip: Review the industrial design or CAD model. If a hard transition is visible, this is your best option. Easy to draw. Easy to defend.
✅ Method 2: Use “Boundary Lines” When No Edge Exists
What if the design doesn’t end at a real edge? You can insert “boundary lines”—special dashed or solid lines that cut through the object.
- Dashed boundary lines = unclaimed edge marker
- Solid boundary lines = claimed part of the design
✍️ Use case:
When claiming only part of a surface (e.g., a touchscreen icon), or one module of a larger product.
Attorney tip: Add a note in the figure description (e.g., “Boundary lines are for illustrative purposes and form no part of the claimed design”) unless they are part of the claim.
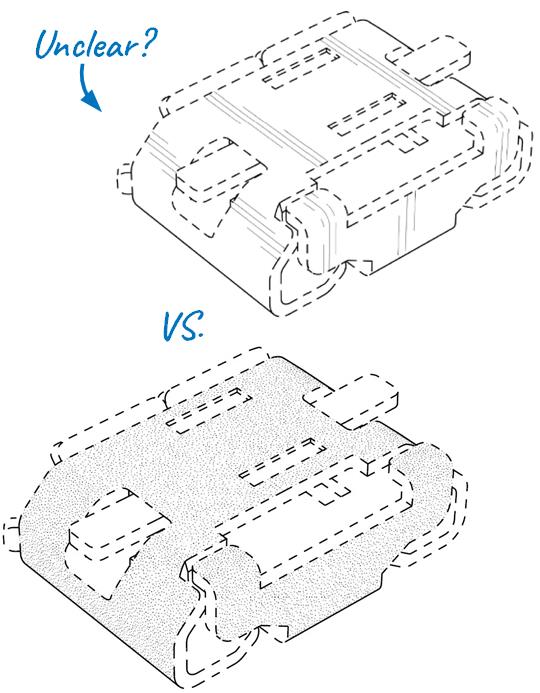
✅ Method 3: Use Constant Shading for Implied Boundaries
Some surfaces don’t have any obvious edge—but you still need to show where the claim stops.
Enter constant stipple or tone shading:
- Shading runs up to the invisible boundary
- Claim ends where the shading ends
✍️ Use case:
When claiming only a portion of a continuous, edgeless surface like a touch gesture area, display zone, or flexible wraparound surface.
Attorney tip: Make sure the drawing contrast is strong and consistent. Avoid ambiguous fades or gradients.
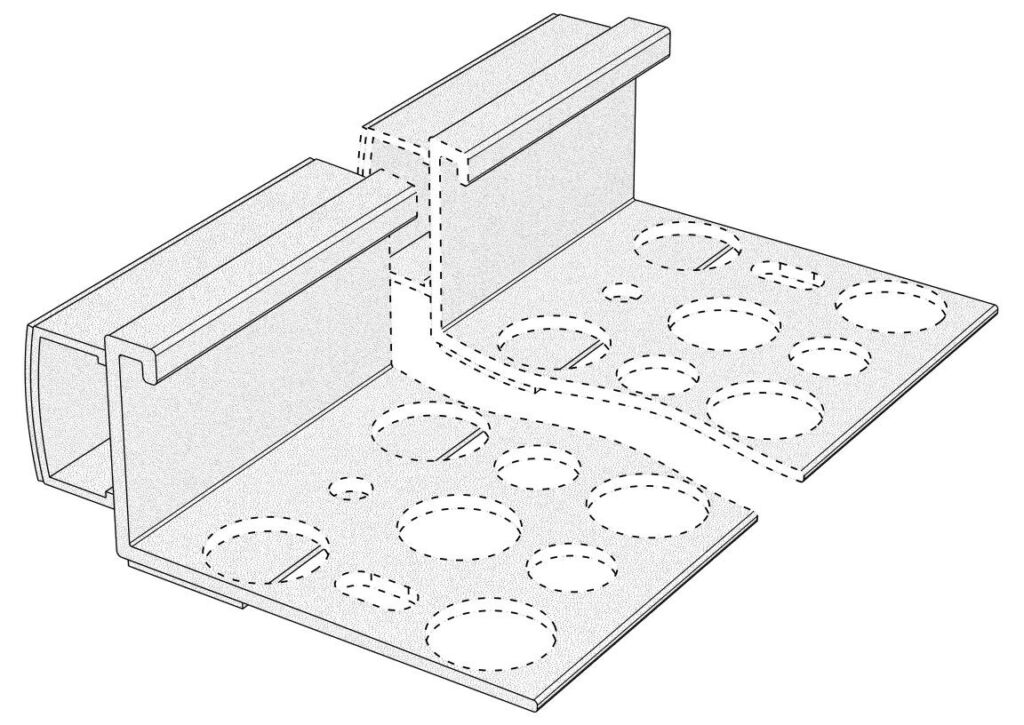
💡 Bonus Strategy: Combine Methods Thoughtfully
There’s no rule saying you can use only one technique. In fact, the strongest design patents often combine:
- Real edges on some sides
- Boundary lines elsewhere
- Shading to reinforce limits visually
Attorney tip: Think like a litigator. Ask yourself:
👉 “Would a judge unfamiliar with the product understand what’s claimed?”
If not, rethink the visual boundaries.
🛠️ How STIPPLES Helps Attorneys Set Claim Scope
STIPPLES drawings from IP DaVinci are built to support claim scope clarity and enforceability:
- ✅ Clear edge transitions
- ✅ Optional boundary lines with disclaimers
- ✅ High-contrast stippling for implied bounds
- ✅ Ready-to-file images that survive litigation
We also align figure labeling and description text to USPTO and CAFC guidance—so you’re not guessing what’s covered.
📥 Get STIPPLES Drawings Built for Litigation
Ready to eliminate drawing ambiguity and strengthen your design patent claims?
👉 Contact Us to Upload a Design or Discuss a Drawing Strategy